Prerequisites
- WordPress 6.0 or higher
- A Social Post Flow account
Installation
To install the Social Post Flow WordPress Plugin:
- Navigate to Plugins > Add New Plugin in WordPress
- Type Social Post Flow in the Search Plugins search field, and press the Enter key
- Click Install Now beside Social Post Flow
- Once installed, click Activate
Connection
To configure the WordPress Plugin to start sending your WordPress Posts to Social Post Flow, either:
- Click the link in the notice on the WordPress web site:

- Click Social Post Flow in the WordPress administration menu:

On the screen, click Authorize Plugin

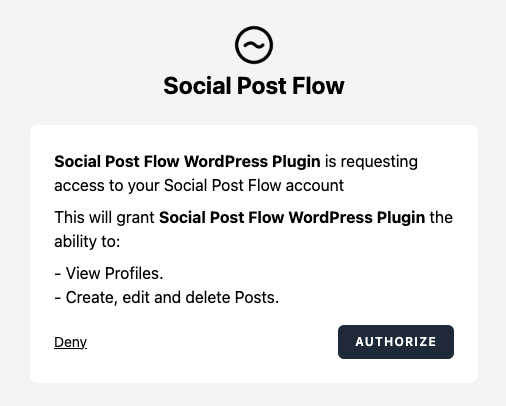
You’ll be redirected to the Social Post Flow web app at app.socialpostflow.com, and asked whether you want to grant the Social Post Flow WordPress Plugin access to your account.

Click Authorize.
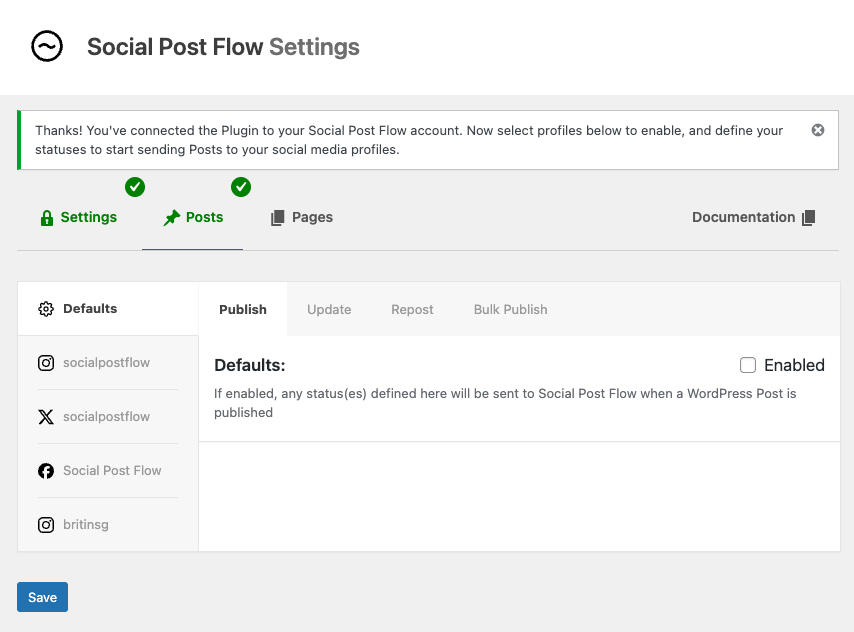
You’ll be redirected back to your WordPress site, and the Social Post Flow settings screen for Posts.

Configuration
The final stage is to configure Social Post Flow to send WordPress Posts to your connected social media account(s) when you publish a WordPress Post:
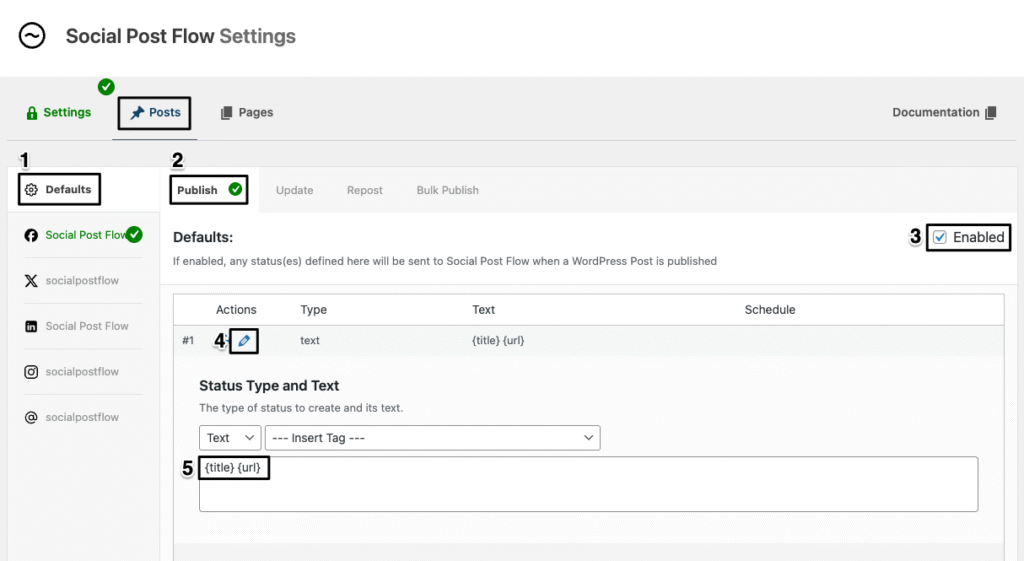
- Click the Defaults tab
- Click the Publish tab
- Tick the Enabled checkbox
- Edit the status by clicking the pencil icon
- Enter the text for your status. For now, use {title} {url}

Next, choose which social media profiles to publish a status to when you publish a WordPress Post:
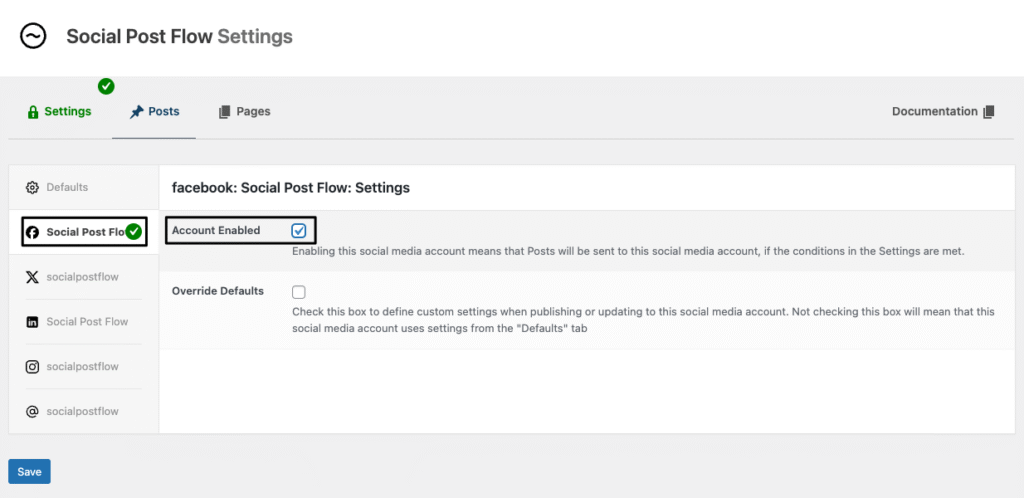
- Click each social media profile in the left hand tab navigation
- Tick the Account Enabled checkbox

Finally, click Save.
Congratulations – you’ve now configured the WordPress Plugin to send the title and URL as a new social media post whenever you publish a WordPress Post!
Next Steps
Social Post Flow’s WordPress integration can do much more than we’ve walked through in this guide. Be sure to check out the following documentation to further configure the WordPress Plugin:
- Status Configuration and Types: How to post different types of content (text, images, links) to social media, multiple statuses and scheduling options.
- Status Tags: How to dynamically replace text in the status with your WordPress Post’s information, such as the title, excerpt, categories, tags, author, custom field data and more
- Per-Profile Statuses: How to specify different statuses for each of your social media profiles
- Per-Post Settings: How to specify statuses when creating or editing a WordPress Post
